TRULY Universally Flattering Makeup

Whether you’re on the lightest or darkest end of the foundation shade range, I’m going to be dropping my makeup kit “go to” products to achieve the most flattering, youthful complexion.

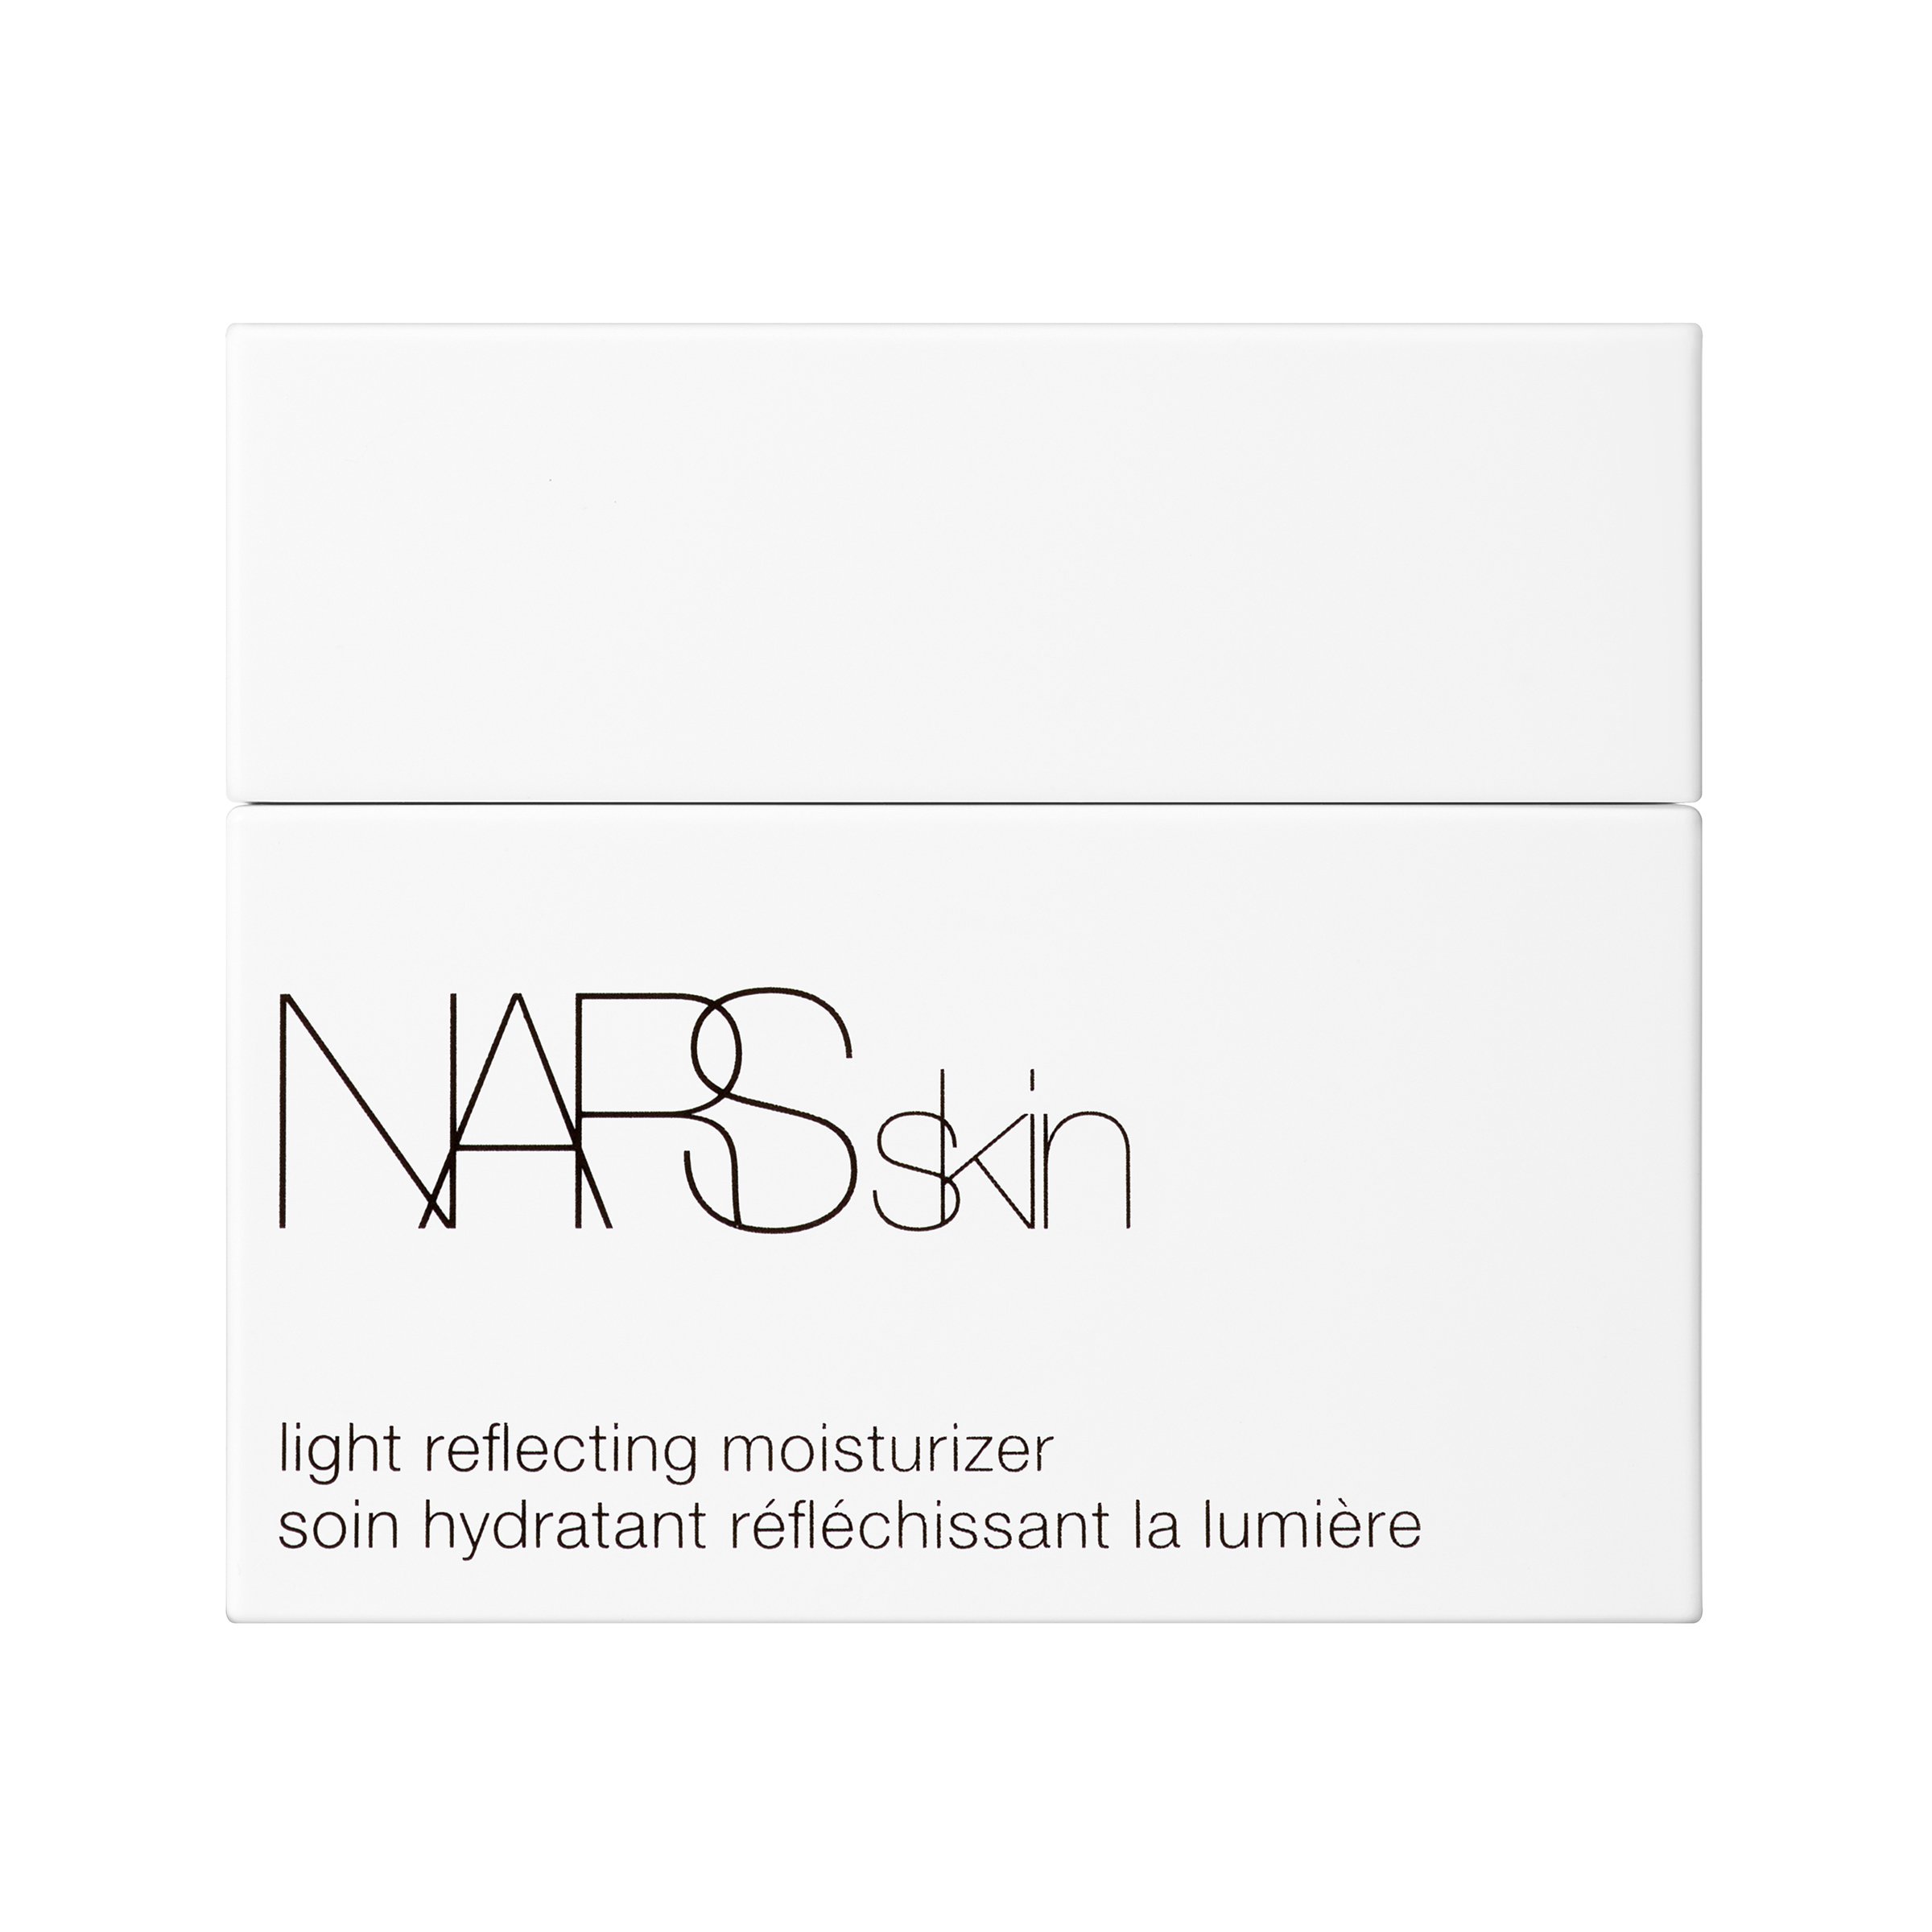
To kickstart, let’s energize our skin with a generous amount of moisturizer (I’ve touched on my favorites in a previous post, check it out!). I always go for something brightening and illuminating such as NARS’ Light Reflecting Moisturizer for a perfect base. After you prep your skin for makeup? the magic begins!


Now let’s conceal any imperfections using your favorite concealer and grab Nudestix’s Nudies Matte Cream Blush in the shade “Hot Fire” and thank me later. This blush is multipurpose here, guys! Blush… Lips… Eyes! All in one product, making our makeup bags much lighter. This formula is buildable so apply it at your own leisure! Let’s pop this on the apple of our cheeks for a natural, universally flattering shade of everything. ;)

You’re more than likely wondering how you could use red on your eyes…? Is it wearable? YES! Because of its matte formula, it dries down nicely and you can put shadows on top of it. I’d start with a small amount on the lid, blending it into the crease and finish with a light champagne or rose gold toned shimmer on the lids with your ring finger. Finish off the eyes with liner and mascara.

You could use this on your lips for this look too, just wearing it alone or you could enhance it with a TRULY universally flattering gloss like Haus Labs By Lady Gaga’s PhD Lip Oil in the shade Primary. This is a sheer cherry hue that is dreamy on literally everyone and they give you that super high shins of a gloss without the sticky feeling.

HOW TO: Creamy Complexion

There’s nothing in this world of makeup that I love more than a cream product. These are so heavenly on all skin types! The way they can leave the skin fealing luxurious and so radiant. I’m going to share some of my favorite products with you below. These are things that have become STAPLES in my kit and routine.

Rhode Barrier Restore Cream - $29

I’ve been starting nearly every makeup application with this cream and there is no other word to describe it other than “heavenly.” This formula is super super rich yet so lightweight at the same time. Not only are we hydrating with this cream, but we’re also doing just what it’s called, restoring our skins barrier. It’s a perfect pre-makeup base!

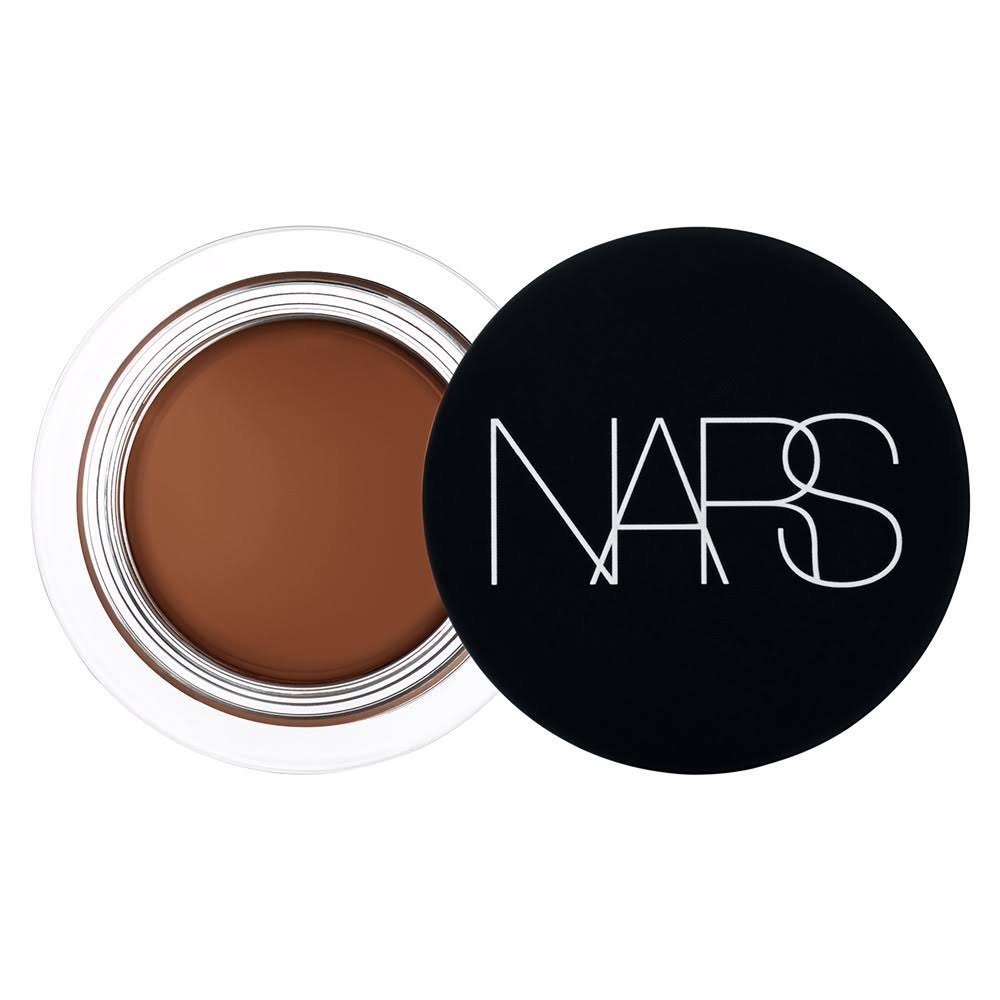
NARS Soft Matte Concealer - $30

If you have oily to combination skin, you’ll be obsessed with this concealer, after your Rhode BRC in Step 1. Tap this creamy, soft matte finish concealer on top of any blemishes or dark spots. A little bit can be stretched so far!

Giorgio Armani Luminous Silk Concealer - $38

If your skin is on the normal to dry side of the spectrum like me, definitely go with this one. I love this option because I tend to have dry patches and this doesn’t cling to them. However, I also swear for this in my kit because it’s so undetectable on camera and in person, never ever cakes and it’s literally just like silk.

I actually have nearly every shade of this in my kit… I find it such a versatile product. Conceal your blemishes, highlight with a lighter shade, warm up the perimeter with a darker if you’re really feeling it. After doing whatever makes you feel happy again, move on to some COLOR!

Freck Beauty Cheekslime Blush + Lip Tint - $22

My favorite part! Adding a little color to our cheeks makes us look alive and healthy. I’m a firm believer that the right shade of blush will make every look top tier, even when you don’t want to look like you’re wearing anything at all. Freck Beauty slayed this formula of a cream blush. The point of this post is for that healthy, creamy complexion! I want my skin or my models skin to feel weightless, glowing and glazed, hence why I haven’t mentioned powder.

My favorite shade of this is “Cuffed,” I find it to be the most flattering soft pink shade on numerous skin tones and it’s gorgeous on the lips! We love a lightweight makeup bag too. ;)

Tom Ford Shade & Illuminate - $89

Just because you see the price tag is this steep doesn’t mean run away. Splurge here, folks. These creams are super blendable and buttery. Use your finger or a brush to sculpt your cheekbones to the gods or even pop a little on your eye lids. These are my holy grail, all shades. Thank you to the makeup gods for creating something so fluid and perfect!

Caudalie Beauty Elixer - $49

I literally liveee for face mists. Defintely take a look into using one if you haven’t already. This one in particular is my favorite to help prep the skin for makeup, setting makeup for a dewy, glass-like finish. It’s infused with Mint & Lemon Balm essential oils to tone, soothe and refresh the skin while the Rosemary essential oil purifies and the Grape extract softens and hydrates. Finish with your favorite mascara and you’re done!

This is your last step before walking out the door with a creamy, dewy complexion. Let me know your thoughts on my take on super simple, every day, creamy complexion. If you have products that you swear by for this, I’d love to hear! In the mean time… enjoy! xx

Makeup for mature skin

Hey, guys! So, a while back we talked about moisturizing for mature skin. This week, I’m posting about none other than… makeup for mature skin! I’ll be sharing my favorites from my kit that I personally use on my more mature clients. Keep in mind, these products, tips and tricks aren’t only for this skin type! Literally anyone can use them, no matter the age. A lot of them, I even use myself. Keep reading if you’d like to know how to achieve skin that you’ll be proud to call your own.

FOUNDATION:

Choose something that is lightweight and easy to apply. No one has time for such strict routines. If you want something quick that you can use with your hands, try a tinted moisturiser. Once again, always go for formulas that are appropriate for your skin, only choose oil-free if your skin is particularly oily. One that I have used and worked with would be the Laura Mercier Tinted Moisturizer ($44). It gives a sheer coverage that will even out redness and the skin tone in general. It's best to use something like this combined with a concealer over the top if you're in need of more coverage in certain areas. This will give you a natural look and won't sit in any fine lines or wrinkles. Try not to use too many power products. You can use a little powder to set your makeup, but the overall finish should not be matte or dry looking. 

FCB0997D-71CC-4733-8657-654B6DD7CC65.jpeg

Another alternative for the ones who adore fuller coverage, I haven’t forgotten about you. Stop what you’re doing and rush to your local Ulta Beauty to scoop up Pur Cosmetics “Love Your Selfie” foundation and concealer duo. On the outside, you have a pump for the foundation, but whenever you unscrew the pump, on the inside, you have a doe foot applicator which would be used for concealer. Boom. You’re killing two birds with one stone. Pur Cosmetics is known for being clinically tested and their ability to be so clean whenever it comes to their ingredients. Also… they’re based right here in Atlanta! How cool is that?

Armani Power Fabric’s super longwear formula isn’t heavy, in fact, it’s actually super airy. If you want a natural finish along with a decent amount of coverage… look no more. Loaded with SPF 25, you’re protected from the sun while coming in 30 shades for nearly everyone. This is one of my favorite formulas for mature skin just because it lays so nicely on the complexion. Also, I’ve found that this can be a “self-setting” formula so there’s no need to set with powder if you really don’t want to. ;)

POWDER:

No matter how “old” you are, it is totally okay to wear powder, as long as it is the right formula and it’s applied properly. Of course, I’ll give everyone the run down on how to apply the powders so they don’t settle into fine lines, wrinkles and pores. One of my favorites is the Charlotte Tilbury Airbrush Flawless Finish Powder. This is a cult classic and most definitely a staple in my kit not only for my clients but for myself! This powder is a true GAME CHANGER! Blur your pores and set your makeup in place for all day wear + you’ll look red carpet ready. I’m obsessed with any product that can save me time while getting ready. I have two fur babies at home and they act just like children, you never know what they’re doing or may be getting into. I’m a traveling makeup artist so I’m always on a time crunch and on the go. Thankfully, these powders are multipurpose. Set, touch-up or blot away shine with this bad boy.

Whenever it comes to the placement of powder, it can be somewhat tricky. I’d like to say that I created this but I’m 99.9% sure that I didn’t… the “press and roll” technique. You guys! This makes such a difference. I like using a more round powder brush (my favorite is the NARS Yachiyo brush, yes it’s $55 but there’s so many dupes online, check amazon. They’re probably less than $10). How you do this technique is to hold the brush at the back end of the handle and pick up light layers of your powder, whichever powder you use, and press it onto the skin and roll it. Pick it up, press and roll it again. I typically start in the center of the face, on the side of the nose. Then I’ll work my way around the face lightly. Remember, it’s easier to add more than it is to take away. Whenever it comes to the under eye, using even less powder than around the face, do the same technique. The purpose of this amazing technique is to lightly set the makeup to secure the longevity and to add a soft matte, blurred finish.

CHEEKS:

I honestly can not do someones makeup without something on the cheeks. Without it, we’re all one color and we don’t look like we have any “life” to us. Blush is my secret weapon at all times. On more mature skin, I tend to use more cream blushes and bronzers because they always look the most natural and radiant. Radiance is key. Just to name a few of my favorites, Stila Cosmetics’ convertible cheek colors, NARS liquid blushes or even your lipstick! Yes, your lipstick. Take a little bit on the back of your hand and use a brush to pick the product up and apply it to the apple of the cheek. When doing this, you will have a monochromatic look that you seriously can not go wrong with. It’s fool proof.

DD99215A-D263-4FE7-8D6F-827D028838A1.jpeg

As for bronzers and contouring out the rest of the face, like I said before… Less is always more. At this point, using powders is totally fine. you’re only applying these on the perimeter of the face. My holy grail is the Chanel Les Beiges Healthy Glow Powder but if you are on more of a budget, take a look at Benefit’s Hoola Bronzers or even Physicians Formula’s Butter Bronzers. These are all light weight while being able to build up to whatever color floats your boat. You can apply these starting in the middle of your forehead at the hairline and work your way around to the hollow of the cheekbone and then under the jawline. So, basically a “3” motion.

0598F76A-1DE6-44B7-A055-6EA0400A7959.jpeg

EYES:

We all love a little eye makeup. Whether it’s a simple coat of mascara or even full on glitter eyeshadow, we all love it. It’s the best way to enhance the first thing that someone looks at when they talk to you. I learned that back in college while studying Psychology in college. Ever since then, it’s stuck with me. Especially in my career as a Makeup Artist.

Doing eye makeup on mature skin, can be “difficult” (I hate that word) but only if you let it. There is no rules whatsoever with makeup, only tricks of the trade. If you are 99 years old and rocking that glitter eyeshadow, you freakin’ rock. When I do eye makeup on a client with aged skin, I always start by using eye creams and of course, eyeshadow primer. The purpose of eyeshadow primer is to ensure longevity, prevent creasing and fall out, while ,making your shadows more pigmented. My personal favorite is from Makeup Forever, it’s called “Step 1: Skin Equalizer Eye & Lip Primer.” I’ve adored this formula since it launched due to the super thin, non-sticky feel and it locks shadows in for up to 24 hours! And… they’re multipurpose.

D92796F9-D335-4FED-A7FE-41D93010F214.jpeg

As for eyeshadows, I adore the formula from Charlotte Tilbury. If you love quality colors that will for sure last all day, search no more. Charlotte Tilbury is a celebrity makeup artist who developed her own cosmetic line and I am living for every single piece that she has created. The quality is beyond amazing. Her eyeshadows come in a quad. The way that she explains how to use is printed on the back of each quad. Starting with “Prime” which is the first shade that you apply. After, you have “Enhance” as the second shade that you would apply afterwards. Next, you have the “Smoke” shade that you would apply to the outer corner of the eye lid and even along the lash line. Finally, you’re left with the last shade from the palette, “Pop”, which is actually designed to be used with your finger. Apply this shade directly to the lid. These shadows are so beautiful and effortless to use and blend. I believe there are 14 different quads, meaning that you have a wide variety to choose from. My personal favorites are the “Pillow Talk” and “Exagger-eyes” palettes. If you aren’t a fan of shimmers, have no fear. Take a look of her eyeshadow quad called “The Sophisticate.”

9BE52407-912A-4DBC-9BD2-4E79AF422224.jpeg

Eyeliner is a staple to me in my kit, whether it’s a dark brown, charcoal, black or even purple. I love eyeliner. If you are afraid of trying the typical black liner, opt out for a light/dark brown or even a slate grey. I love tight-lining the top lashes. What is that, you may ask? Tight-lining is when you take the eyeliner and apply it directly to the lash line. What does it do? It makes your lashes appear 10 times fuller and darker. You could easily do this trick and run out the door and call it a day. I typically always do this when glamming up my clients. No matter the age. I love fuller and darker lashes. I mean, who doesn’t? For this, I adore using a waterproof eyeliner pencil because they tend to stay a lot longer. I would recommend Pur Cosmetics’ On Point Eyeliner Pencil. These are waterproof but can be easily removed when needed. They’re also enriched with Ceramide III, which is their Lash Rejuvenation Complex and essential oils to prevent lash fallout and provide moisture at the lash line without causing it to smudge or budge. They’re also ocular tested! Yay for an eyeliner that is safe for sensitive eyes!

A259D93E-5BEE-4A8F-B959-0F4E14F9A4B8.jpeg

I feel naked without mascara. I’m pretty sure that we all do. Doing just a simple coat makes me feel a hundred times better and more confident. I’ve tried so many mascaras but I only tend to keep going back for one in particular and that’s the “Fully Charged” by Pur Cosmetics. Yes, there is a lot of this brand in my kit and all over this blog. It’s just one of my go-to brands since their products are such high performance, consist of clean ingredients and they’re affordable. This mascara gives off tons of volume without the clumping or flaking. Due to it’s hourglass wand, it grabs all of the lashes to lift and hold a curl. You can layer this over and over to build up your desired volume without any clumping whatsoever. I would gladly take a bullet for this beauty.

292E3DA6-531D-49A0-98D2-5FE8E0839896.jpeg

Alright, you guys! That’s it for this weeks blog post. I had so much fun being able to share my knowledge with all of you about makeup for mature skin. Like I said above, these aren’t rules, by any means. They’re tricks of the trade. There aren’t any rules when it comes to makeup. However you feel like you are the best version of YOU, is what matters. If you have any questions at all, comment below or shoot me a DM on Instagram or email me. I’d love to see the looks that you guys can create using my tips and tricks! See you guys soon!

DOs & DON'TS for oily/acne prone skin

Hi, guys! I’m back again with a new blog post for none other than... do’s and don'ts for oily and acne prone skin. I’ve been requested this by so many of my friends, family and clients to do this for such a long time. As most of you should know by now, I absolutely adore skin care. If you want great looking makeup… just know that it will only look as good as your skincare. Whether you are using a face wash from the Dollar General or from Sephora, it doesn't matter, as long as you are doing something!

The DO’s:

DO wash every morning and night. Those who have oily to acne prone skin, should be consistent with cleansing their skin. Think of it as a routine. You brush your teeth in the morning and at night, as should you do the same with your skin. The best facial cleansers are the ones who will help combat that shine (oil) that you probably can not stand during the day but still not strip the skin of the natural oils that we actually need. I recommend the Clarifying Cleanser from Murad. This baby has acne fighting medication that fights breakouts not just the second it touches your skin during your cleansing routine, but also after. That’s right, even after you rinse it off. Thanks to it's two different types of Salicilic Acid! Also found inside, you have Green Tea Extract, which is meant to soothe any irritation for clearer, healthier looking skin. This is the most advanced formula for fighting oil and breakouts that I’ve ever seen. This is my life saver for my acne prone days!

35026108-3769-430D-ABEA-DC2669A6266A.jpeg

DO clean your brushes! Just to clarify this, please do not use your fingers to apply your makeup. That is one of the worst things you can do to your skin. Not only that, but your makeup application will always look its best when using the proper tools, brushes and sponges! Use a cleanser for these tools, such as It Cosmetic’s iconic Bush Bath. This is an instant makeup brush cleanser meaning it literally cleans them instantly without the drying time. You spray it directly onto the bristles or onto a towel, swirl around and it will immediately begin to break down any leftover makeup. Let it dry for maybe a minute or two, then proceed with your day. This is an absolute must have in my makeup kit for myself and on set!

8EF55758-9D99-442F-B7A6-08097D4148FE.jpeg

DO your research on the right makeup for you. When shopping for makeup, research which brands are clinically tested, products that are silicone and oil free! The silicone can not only clog your pores but it will cause your makeup to slide around. My top brands that I would recommend would be, CoverFX, Ilia Beauty and Milk Makeup.

The DON’Ts:

DON’T touch your face nor pick your blemishes. Doing this only adds more fuel to the fire. It adds more dirt and debris, causing breakouts. Try to pay attention throughout the day and keep your hands off of your face. If you’re pretty absent minded like me, I’m forever washing my hands or using germ-x. I’m such a germaphobe.

DON’T sleep with a dirty pillowcase. I actually swear by this “rule”. My fiancé started doing this whenever we moved in together and it has been a lifesaver ever since. These absorb so much dirt, debris, dust, grease, etc. TJ is super oily and acne prone so we stocked up on our favorite pillow cases and swap them out every couple of nights. We bought these from Amazon for about $48.00 a piece. They’re silk pillowcases which actually help with not only our skin, but also our hair. I’ll place the link below, just click on the photo.

DON’T skip the moisturizer, you really need it. Yes, you have oily skin but you do need moisturizer. A lot of the time, what’s happening is that your skin isn’t receiving as much moisture as it genuinely needs, so it is overproducing oil to make up for that loss. I highly recommend a mattifying moisturizer, such as the one from Murad. Their “Oil and Pore Control Mattifier” is literally perfect and also has a broad spectrum SPF of 45! This gives you 10 hours worth of oil, shine and pore control while leaving your skin hydrated at the same time. You can wear this alone or wear it under your makeup as not just a moisturizer but also a primer. This is an actual must have in my kit!

4910847F-FC8E-4059-B31F-4513D67BA0BD.png

DON’T over treat or medicate your skin. When battling acne or oily skin, a lot of people feel as if the odds are against them so they resort to all of these products with a million different types of medications that are in their ingredients, thinking this will help. But actually… you are wasting your time and money. 99% of the time, this makes all of the products counter-productive! It doesn’t allow any of your products to do their jobs at all. Instead, find one regimen and give it a whirl. Don’t over treat the skin or you can begin to see signs of irritation such as red spots and inflammation. Instead, try treating the skin with a face mask either once or twice a week.

My favorite red lipsticks + how to make them last all day

It may not be every day that we wear a red lip but when we do, we want it to look as perfect as possible. I personally don’t do a red lip as often as I wish when doing glam with a client or on set of a photoshoot. Which I’m working on something super amazing for Valentine’s Day, hence why I’m posting this before hand. Working in the cosmetic industry, you will see a huge sky rocket in sales, right before Valentine’s Day, of lipsticks that are in any shade of red!

You may not think you can pull off a red lipstick, but I’m sorry to say it… but you are very wrong. There’s so many shades that it is freakin’ insane. I guess after experimenting with these for going on eight years, I’ve definitely found my “safe zone”. Which is normally a blue based red. Why, you may ask? A blue based red tends to have a slighter more cool tone to it, making the teeth look super super white as if you just had a $500 bleaching session at the dentist. I also tend to go for more of a velvet-matte finish. not a sheen. I feel like most “matte” lipsticks can leave the lips looking like raisins. *shoulder shrug*

I would pair this with more minimal makeup since these tend to be more bold. You don’t want to be rocking a bold lip AND a bold eye… That’s totally not a good idea, it appears to be a lot going on. I would pair a bold lip with maybe a little bronzer, a couple of coats of mascara, light blush and well groomed, fluffy eyebrows. Makeup that looks more undone, as if you just woke up like this. I’ll post my favorite blue based red lipstick below.

Charlotte Tilbury matte revolution lipstick - red carpet red $34

Charlotte Tilbury matte revolution lipstick - red carpet red $34

I seriously love that red lipstick so much. It has the most beautiful texture on the lips. They’re moisturizing and comfortable while still being a matte finish, which believe it or not, is actually very hard to find in a lipstick formula. They are typically either shiny or heavy feeling… leaving your lips looking like literal raisins. Although, Charlotte Tilbury is a luxury brand and some of you may not be able to afford it, I’ll post some other beautiful colors below! Also, this brand is rather difficult to find with it being on the newer side. You can find it in select Sephora, Bloomingdales and Nordstrom stores, just keep your fingers crossed while shopping!

NARS velvet matte lip pencil - cruella $27

NARS velvet matte lip pencil - cruella $27

Maybelline superstay liquid lipstick - pioneer $9

Maybelline superstay liquid lipstick - pioneer $9

Fenty stunner lip paint - uncensored $24

Fenty stunner lip paint - uncensored $24

How to make your red lipstick last all day

I am not a huge fan of liquid lipsticks because they can be drying and leaving your lips feeling like it too. Although, I have learned so many more tricks and tips for using them. I’ll share them with you guys, of course!

  1. Start with a lip liner. My all time favorite red lip liner that I have found works with so many different ones is: MACs lip pencil in the shade “Cherry.” Begin outlining the natural shape of the lips. Once that is complete, fill in with the lip pencil.

  2. Take your liquid lipstick and apply a small bit to the center of the lips and use your finger to blend. I adore brushes but just like Charlotte Tilbury (who I learned this from), blending with your finger is pushing the product into the skin, meaning more longevity.

If you aren’t using a liquid lipstick, follow step one that is above. Then, use a brush. You can get the same effect as a liquid lipstick when you apply a layer with a brush, blot with a tissue and reapply. I do this about three times and it lasts nearly all damn day. I’ve ate and my traditional lipstick was still perfectly in place.

Lastly… tissues will be your best friend. Keep a couple in your bag so you can blot away any grease, food, frozen yogurt - whatever you’ve eaten. Blotting makes it easy to reapply, that way you have a smooth surface!

Moisturizing mature skin

Aging. We all age and we all hate it. It's a part of life. My mother always said "if you take care of your skin while you're younger, you will thank yourself later.." So ever since I can remember, I've been moisturizing, exfoliating and using serums. Anyways, I'll share my skin care routine later. If you want to know more about how to properly care for mature skin... keep reading!


SKIN:

It would be wrong to say that everyone after a certain age, has dry skin. It simply just isn't true.  But a large portion of us will tend to range from the normal to dry side of the spectrum, so getting yourself organized by drinking plenty of water and setting yourself up with a good, simple (not everyone has time for 100 different steps) skincare routine is the first thing.  I love doing makeup for my more life experienced clients, especially when you see their joy of natural, youthful and glowing makeup. Achieving plump and glowing skin is the best and easiest way to get the most youthful and fresh look. Throw the contouring pallets aside, they won't do you any justice here.


MOISTURIZERS:

I don't want to be the bearer of bad news, but those expensive anti-aging moisturisers are really not worth the investment, after all, you can't expect too much from a cream to make physical changes. Choose a product that really hydrates and is adapted to your skin type. Are some of the anti-aging formulas scientifically proven to work? Yes, but with very minimal results. That extra money should be spent on a new purse or even for a good laugh and a catch up with a friend. After all, they're called laugh lines for a reason, embrace them! They say so much about your story. I'm going to share one of my all time favorites... Okay, I lied. I can't pick only one. So here's two of my all time favorite moisturizers for dry skin that will give you that plumped glow that everyone would kill for. 

First up is Bobbi Brown's Extra Repair Moisture Cream ($98). Now, Bobbi might not be your first thought when it comes to skincare, but she seriously knows how to make things smell amazing and give your skin an intense moisture boost! 

I love how it just glides onto the skin, giving a dewy finish and a great base for makeup application.  You can choose with or without SPF 25, but considering that sun is the worst contributor to aging skin, you should be protecting your skin on a daily basis, even on cloudy days! 


Second, is the NARS Luminous Moisture Cream ($64). Once again, you would never thing of NARS being a good skincare brand because their main focus is on makeup, obviously. This beautiful cream is a soft, velvety cream that is clinically proven to deliver up to 24-hour hydration, replenishing the skin with moisture and infusing it with luminosity!  I bought this a while back at the NARS boutique in Buckhead and it has been a staple in my skincare routine ever since. 


Lastly, yet another Bobbi Brown product, their Vitamin Enriched Face Base ($66). This has to be my “most gravitated towards” product in my whole makeup kit. I can use this on literally any skin type leaving them with a perfectly primed and hydrated complexion. With a blend of vitamins B,C & E, you’re nourishing the skin and brightening at the same time. 10/10!


 Eye Creams:

We’re going to start this one off super strong and leave you with my one and only holy grail… with another Bobbi Brown product. Guys, just an FYI, this isn’t sponsored by them in any way. I’m genuinely just obsessed with how these products work so well not just under makeup but also ALONE!

Bobbi Brown’s Vitamin Enriched Eye Base ($58) is a literal one stop shop. This is what I would call the face moisturizers baby sister. The vitamins are slightly more different. Jam packed with hyaluronic acid, vitamin A to smooth out fine lines around the eyes, B3 & C to brighten dark circles, vitamin E for antioxidants as well as caffeine to help reduce any puffiness! Apply a pea size of this around your eyes before makeup and you for sure won’t be creasing.


I’m kidding. As if I could actually leave you guys with only ONE option? No way! If you are looking for something to truly target fine lines and wrinkles while still moisturizing your under eyes, check out Sunday Riley’s Auto Correct Brightening + Deputing Eye Cream ($68). This is one that I would highly recommend using morning and night. You would also use a pea size of this around the eye area, patting in with your ring finger. Why your ring finger, you may ask? This is our finger that naturally has the least amount of pressure. The under eyes are a different type of skin than what is around our face.


Well, folks. I hope you guys enjoyed my first actual blog post. Let me know if you have any questions or concerns about any of this (the contact is above, under the "Contact Me" tab). I'd love to hear about any products that you have tried!